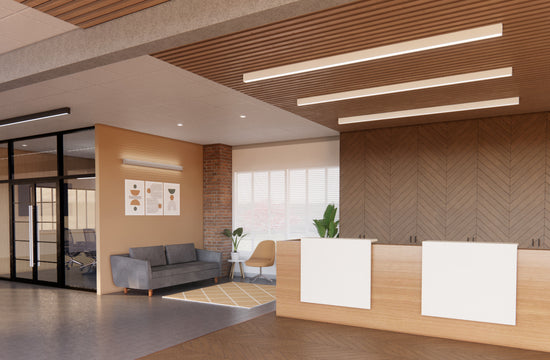
ELEMENT 62
SUSPENDED INSTALLATION

The first step is to determine if you are installation a single or multiple module luminaire.
You can download the installation guide (above) or use this page to guide you through the process.
Suspension of Element luminaires is one of the easiest mounting options. Luminaire will come with 4m suspension wires (as standard) which are suitable for both standard or pitched ceilings.
Some additional links you may find useful:
View Product | Suspended Specification
-
Modules
For lengths up to 2540mm, we produce the luminaires from a single piece of aluminium. Lengths greater than or equal to 2680mm consist of several modules that can be easily connected on-site using joiners and pre-installed power connectors.
This modular approach simplifies accessibility during installation & helps reduce freight costs.
Feed & End modules used for lengths ≥2680mm
Mid module used for lengths ≥5065mm
Long lengths may have several mid modules. -


Single Piece Luminaire Installation
-
SUSPENSION INSTALLATION
1) Suspension wires will come pre-fitted in luminaire and are designed to slide along the top channel to allow location adjustment. Remove the Suspension Wire from the Suspension Gripper by partially unscrewing (~3mm) the Adjustment Button, then pressing the button in to release the wire.2) Measure & mark desired suspension locations FIG 1.1. Unscrew base from Barrel and screw mount Base into suitable ceiling substrate.
3) With the Suspension Wire threaded through the Barrel Swing Channel so the Locking Ball at the end is contained, re-screw the Barrel onto the ceiling mounted Base.
4) For pitched ceilings - To ensure the cable hangs freely, screw the barrel so that the swing channel is aligned to the ceiling slope, allowing the Suspension Wire to hang straight down.
5) Suspension Wires are 4metres - allowing (in many applications) the luminaire to rest on the floor while the wires are connected. If the ceiling height is over 4metres, the luminaire will require support during next steps.
6) Partially unscrew the Adjustment Button ~3mm to allow wire movement, then feed the suspension wire through the Suspension Gripper Adjustment Button and out the Wire Outlet.
7) While the luminaire is supported at the desired height pull excess wire through Wire Outlet. The Adjustment Button of the gripper will prevent cable from coming back out. To release the wire, press this button in.
8) Once at the correct height - tighten the Adjustment button fully to secure wire at the final height.
9) The excess suspension wire should be trimmed off once the luminaire is installed at the desired height to ensure a clean & tidy result.
10) See cable base electrical connection installation (below).
-


Electrical Connection | Cable base Mini
The mini cable base is designed for installations where access is available above the ceiling.
For installations where access is limited, an alternate cable base may be required:
Ø80mm Cable Base surface mount (BL-LP-S104X) or Ø80mm Cable Base recessed (BL-LP-S105X).
-
1) Select appropriate ceiling location for cable base - should be into suitable material and where the luminaire power cable can reach the ceiling power source.
2) Drill hole in ceiling for power feed cable.
3) Position and screw the base onto ceiling using the three mounting holes, ensuring the ceiling hole is aligned centrally.
4) Thread the power feed cable through face plate then base and ceiling hole.
5) Tighten the cable locking pin (on the base) to prevent excess cable from slipping. Or loosen to allow movement.
6) The face plate has a prefixed magnet ring. Simply press up against base.
7) Make electrical connection in ceiling cavity. -


Multiple Module Luminaire Installation

-
LAYOUT PIECES
1) Luminaire modules can be connected while resting on the ground/flat surface OR one at the time while being mounted.
For longer lengths Bright Light strongly recommend connecting pieces one at a time and mounting each before adding the next.
2) Clear enough space to lay out full luminaire in the correct order as per FIG 2.1 (above). Ensure surface is clear to avoid scratches.
SUSPENSION3) Follow the Suspension installation steps under the single luminaire section (above) for each module section and FIG 2.2 for suspension placement.
ELECTRICAL CONNECTION
4) The electrical power connectors are built-in at joins between pieces. Power connectors match female to male as shown in FIG 2.1. These will be aligned and connected at the same time as the mechanical joiners.
MECHANICAL JOINERS
5) Each join will have two sets of mechanical joiners (internal & top) which come pre-mounted in the mid (if present) and end modules.
6) Internal joiners require screw access from below (diffuser side). This may involve pealing out a section of the diffuser (if pre-installed).
While connecting, luminaire modules should be aligned & firmly held together while the joiner screws on either side are tightened.
7) Top joiners require screw access from above. Luminaire pieces should be aligned & firmly pressed together while tightening the screws
8) Steps 6 & 7 will need to be repeated for all joins. -
REFLECTIVE FILM
Reflective film is used inside the luminaire on either side of the gear trays and needs to fully cover the internal luminaire sides for uniform light output. This film is secured by slotting under the luminaire profile lip and against the LED board clips. Certain locations will have had the reflective film pushed back for access:
8) Physical module joins - 500mm sections are used over joins, these will be pushed back into the connecting mid or end module with a removable arrow sticker showing direction to slide in after the join connection is made. NOTE: The internal joiners create a slight bulge to the reflective film and film may need to be “moved” rather than “slid” in these locations.
DIFFUSER (Only fit once installation is completed.)9) Replace or insert diffuser. Measure luminaire, then trim diffuser to exact luminaire length minus 10mm.
10) Luminaire end caps have a ledge with 5mm space underneath for the diffuser to prevent light bleed. Slot one end of diffuser under end cap ledge, then run along luminaire pressing diffuser in on both sides to achieve a flat surface. If pushed in too much, lift out section and press in again gently. When approx 200mm from the end of luminaire, gentle bend the diffuser over to allow the insertion of the end under the end cap ledge, then carefully press remaining diffuser in to create a flat surface.
ELECTRICAL CONNECTION
12) See cable base electrical connection installation (above).